
Breathing new life into an old piece of wood furniture is a project that pays you back tenfold. It's about more than a quick coat of paint; it’s the joy of stripping down a tired piece, fixing its flaws, and bringing it back to life with a finish that feels like you.
You’re not just saving a classic from the landfill—you’re transforming it into something that fits your home perfectly. It’s a sustainable, budget-friendly way to get that high-end look you’d find in Downtown Alpharetta, but with your own personal touch. Or, if you're not the DIY type, you can find incredible pre-owned designer furniture right here in Roswell that already looks perfect.
Why Refinishing Is Worth It (Sometimes)
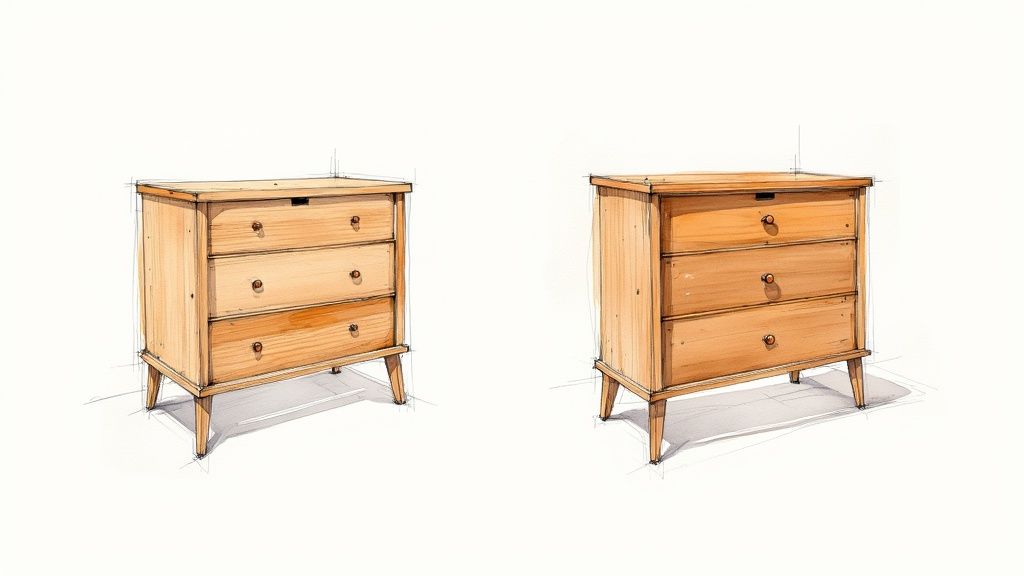
That old wooden dresser collecting dust? It has more life in it than you think. Giving furniture a second chance is one of the most satisfying things you can do. You get to rescue a family heirloom, upcycle a fantastic thrift store find, or finally make that one odd piece match your style. You can turn a worn-out item into a stunning centerpiece for your home.
But sometimes, the real value is in finding a piece that’s already been curated for quality and style. Whether you live in East Cobb, Marietta, or Forsyth County, finding designer brands at consignment value means you get the look without the weekend-long project. It's about finding that Avalon-quality piece at a price that makes sense.
Your Path from 'Potential' to 'Perfect'
Deciding to refinish a piece is where the fun begins. The transformation can be incredible, whether you're restoring a classic mid-century modern credenza or giving a pine table a bold new color. The skills you'll learn can be used on all sorts of projects. If you're tackling your kitchen next, this guide on how to refinish kitchen cabinets is a great resource.
We’re going to walk through the entire process, covering all the key decisions and techniques you'll need.
- The Assessment: First, you’ll learn how to really look at your furniture and decide if it’s a good candidate for refinishing.
- The Prep Work: We'll cover gathering the right supplies and setting up a safe, efficient workspace that makes the job easier.
- The Real Work: From stripping and sanding to staining and sealing, you’ll get clear, actionable steps for a finish that looks professional.
- The Final Coat: We'll dive into how to choose and apply the perfect protective topcoat for beauty and serious durability.
Refinishing isn't just slapping on a new coat of paint. It’s about honoring the craftsmanship of the original piece while infusing it with your own style. You're creating something truly unique that tells a story.
Once you know how to properly refinish furniture, you'll develop a sharp eye for spotting quality. That’s the same eye we use at Board of Trade to curate our collection. Whether you're hunting for consignment furniture in Milton or Alpharetta, knowing what makes a piece great is key.
Gathering Your Tools for a Flawless Finish
A stunning refinishing project is born from great preparation. Think of it like cooking a gourmet meal—you wouldn't start chopping vegetables without having all your ingredients and utensils ready to go.
Setting up an organized, safe workspace and gathering the right tools from the get-go will save you from countless headaches. It makes the entire process smoother and a whole lot more enjoyable.
Before you even think about stripping or sanding, take a minute to set up your workspace. Whether it's a corner of the garage, a basement, or a covered patio, good ventilation is non-negotiable. This is a critical safety measure, especially when you're working with chemical strippers or kicking up fine sanding dust. A simple box fan pointed out a door can make a world of difference.
Safety First. Always.
Alright, let's talk about the gear that protects you. This is one area where you absolutely cannot cut corners. The small investment in proper personal protective equipment (PPE) is nothing compared to the risks of skipping it.
- Respirator: A simple dust mask won't cut it. You need a real respirator with cartridges rated for organic vapors if you're using chemical strippers. For sanding, an N95-rated mask is essential.
- Eye Protection: Safety glasses or goggles are a must. They’ll shield your eyes from chemical splashes, flying debris, and sawdust.
- Chemical-Resistant Gloves: Those standard latex gloves will dissolve when they meet paint stripper. Invest in a pair of thick, chemical-resistant gloves to protect your skin.
Think of your safety gear as the most important tool in your kit. A successful project is one where you and your furniture both come out looking fantastic.
Your Prep and Refinishing Arsenal
With your safety sorted, you can focus on the tools for the job. Having everything organized by task—stripping, sanding, and finishing—prevents you from constantly stopping to hunt for what you need. It helps you stay in the zone.
It’s also smart to consider the environmental impact. The industry has moved toward safer, low-VOC (volatile organic compounds) and water-based options that are less harsh. Proper disposal of chemical waste and sanding dust is critical. You can learn more about the evolution of wood coatings and their environmental impact to make more informed choices.
Your Essential Refinishing Supplies Checklist
To make things a little easier, I’ve put together a quick-reference list of the tools and materials you'll want to have on hand, broken down by each phase of the project.
Here's a quick-reference list of the tools and materials you'll need, organized by each phase of the project.
| Phase | Essential Items | Optional but Recommended |
|---|---|---|
| Safety & Setup | Respirator, safety goggles, chemical-resistant gloves, drop cloths | Box fan for ventilation, fire extinguisher |
| Stripping | Chemical stripper, metal or plastic scrapers, mineral spirits, clean rags | Detail scrapers, brass bristle brush for crevices |
| Sanding | Orbital sander, assorted sandpaper grits (80, 120, 220), sanding block | Tack cloth for dust removal, shop vacuum |
| Staining/Painting | High-quality brushes (natural bristle for oil, synthetic for water), stir sticks | Pre-stain conditioner, painter’s tape, small artist brush |
| Topcoat/Finishing | Your chosen finish (poly, varnish, wax), lint-free cloths, 400-grit sandpaper | Foam brushes for even application, tack cloth |
Having these items ready before you start will set you up for a much smoother, professional-quality refinishing job.
Stripping vs. Sanding: Which Method Is Right for You?
Alright, you've got your space prepped and your safety gear on. Now you’ve hit the first real fork in the road: how are you going to get that old, tired finish off the wood? This is where you have to make a choice between two main paths—chemical stripping or good old-fashioned sanding.
Let's be clear: this isn't about which method is "better" overall. It's about which one is best for your specific piece. The shape of the furniture, its condition, and what kind of finish is on it will all point you toward the right answer. Nail this decision, and you're setting yourself up for a beautiful, professional-looking result.
The core choice usually comes down to the geometry of your piece.
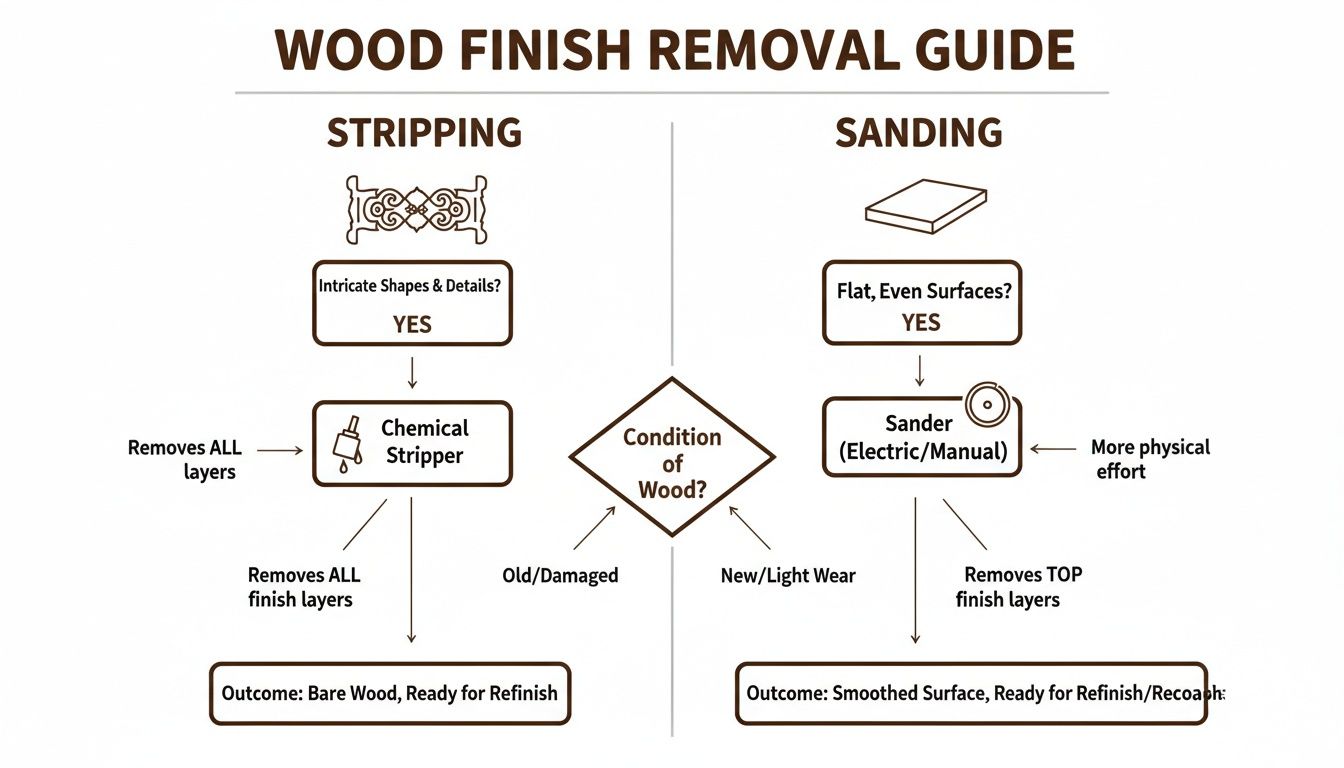
As you can see, intricate, detailed pieces are practically begging for a chemical stripper, while big, flat surfaces are perfect candidates for a sander.
When to Reach for a Chemical Stripper
Think of a chemical stripper as your secret weapon for the tricky spots. It’s a liquid tool that does the delicate work for you, getting into places sandpaper would just butcher.
I always grab a stripper when a piece has:
- Intricate Details: If you're working with carved legs, spindles, or ornate molding, a stripper is your only real option. It gets into every nook and cranny without destroying those beautiful, sharp details.
- Thick Layers of Paint: Got a piece that's been painted five times? Sanding through all that is a nightmare. A good stripper will bubble up years of paint in one go.
- Delicate Veneer: Veneer is just a paper-thin layer of wood. One wrong move with a power sander and you can burn right through it. Strippers gently lift the finish without harming that fragile surface.
- A Desire to Preserve Patina: Aggressive sanding doesn't just remove the finish; it can strip away the subtle coloration wood gets with age. A stripper is much better at taking off just the top coat.
Using a stripper is messy work, there's no doubt. But it's often the most respectful way to treat an antique or highly detailed piece. You're honoring the original craftsmanship.
The Power and Simplicity of Sanding
Sanding is my go-to for more straightforward projects. It's often faster, involves fewer harsh chemicals, and honestly, it’s incredibly satisfying to watch that fresh wood emerge. An orbital sander, in particular, makes short work of big, flat areas.
Sanding is the clear winner when your furniture features:
- Flat, Simple Surfaces: We’re talking tabletops, the sides of a simple dresser, or a basic bench. An orbital sander can strip these areas evenly and efficiently.
- A Thin, Worn Finish: If the piece just has a light coat of old varnish that's already flaking off, sanding is often all you need.
- You Want to Avoid Chemicals: If you're sensitive to fumes or just prefer a more mechanical approach, sanding is the way to go.
A piece like this glass-front sideboard with a painted finish from our shop could be a great candidate for sanding, since its large, flat surfaces are easy to get to.
A Hybrid Approach: The Best of Both Worlds
Here’s a pro tip: you don’t have to choose just one. Most complex projects end up being a combination of both stripping and sanding.
For example, I might use a chemical stripper on the intricately carved legs of a dining table, then pull out the orbital sander to quickly clear the large, flat tabletop. This saves a ton of time while ensuring the delicate details are preserved. It's how you tailor your method to the piece in front of you.
Repairing The Wood And Choosing A New Look
Once you’ve wrestled that old finish off, you finally get to see the raw, naked wood. This is my favorite part. It’s where you can erase every little ding, scratch, and dent and get the piece ready for its next chapter.
Taking the time to fix these minor flaws is what separates a quick DIY flip from a professional-level restoration. If you skip this, every single imperfection will scream for attention under that fresh coat of stain or paint.
Making Flaws Disappear With Wood Filler
Most vintage pieces have a few war stories to tell. You'll see gouges, dented corners, or deep scratches. For these, your absolute best friend is a quality, stainable wood filler.
Think of it like spackle for wood. The trick is to overfill the dent just slightly, because the filler shrinks a bit as it dries. Let it cure completely, then sand it perfectly flush, starting with a 120-grit and finishing with a 220-grit paper. When you do it right, the repair completely disappears.
A rookie mistake is underfilling a gouge. It leaves a slight divot that will stick out like a sore thumb. Always add a little more than you think you need—you can always sand it down.
Stain vs. Paint: Deciding On The New Vibe
With a smooth, repaired canvas in front of you, it’s time for the fun part: stain or paint? This single decision completely defines the new personality of your furniture. It just comes down to the look you're after and the condition of the wood.
Here’s how I break it down for people:
- Stain: Go with stain when you want to celebrate the wood's natural beauty. It highlights the grain and adds rich color. It’s the perfect choice for beautiful woods like oak, walnut, or mahogany.
- Paint: Choose paint for a bold, modern statement, to hide major imperfections, or if you're working with a less attractive wood. Paint gives you endless color options.
Pro Tips For A Perfect Stain Job
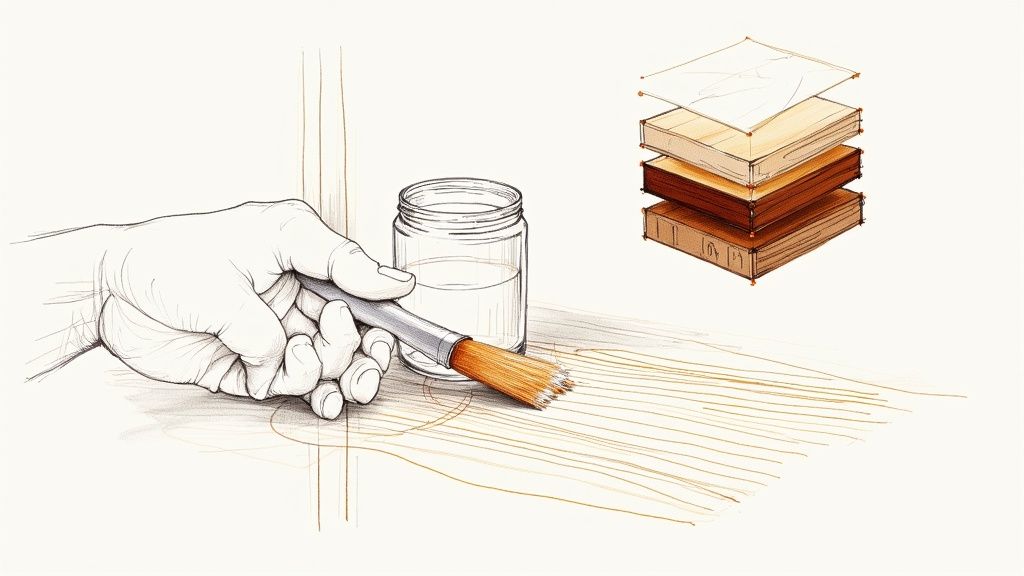
Staining can be intimidating. But a couple of key techniques will give you a beautiful, even color every time. The most important one, especially for blotchy woods like pine or maple, is to use a pre-stain wood conditioner.
This stuff is magic. It’s a thin, clear sealer that helps the wood absorb stain evenly, preventing ugly, splotchy patches. Just wipe it on, let it soak in for about 15 minutes, wipe off the extra, and you're ready to go.
And please, always test your stain on a hidden spot first. Apply the stain with a clean, lint-free rag, moving with the grain. Let it sit for a few minutes, then wipe off the excess. The longer you let it sit, the darker it gets.
Nailing A Flawless Painted Finish
If you've landed on paint, your success hinges on one non-negotiable step: priming. Don't even think about skipping it! A good primer blocks old stains from bleeding through, helps the paint stick, and makes your final color look true and rich. For a truly professional look, check out pieces like this custom white painted wood desk, where a perfect paint job is everything.
Apply one or two thin coats of a quality primer, sanding lightly with 220-grit paper between coats for that buttery-smooth feel. Once it's dry, you're ready for paint. My advice? Use a high-quality brush or a small foam roller and apply two to three thin coats instead of one thick, globby one.
Applying a Durable and Beautiful Topcoat
You've done the heavy lifting. The old finish is gone, the dings are repaired, and that gorgeous new color is on. Now it's time to protect all that hard work with the final, crucial layer of armor: the topcoat.
This isn't just about making it look shiny. A good topcoat guards the wood against spills, scratches, and daily life. It’s the difference between a project that lasts a year and one that lasts a lifetime.
The right topcoat depends entirely on how the piece will be used. A decorative side table has very different needs than a kitchen table that sees homework and hot coffee mugs every day.
Let's break down the most popular choices so you can decide with confidence.
Choosing Your Finish: Polyurethane, Varnish, or Wax
The three main players are polyurethane, varnish, and wax. Each brings something different to the table.
- Polyurethane: This is the modern workhorse of wood finishes. It’s basically a liquid plastic that cures into an incredibly durable, moisture-resistant shell. You can get it in oil-based (adds a warm, amber tint) or water-based (dries crystal clear).
- Varnish: Think of varnish as polyurethane's tougher older brother. "Spar" varnishes are built to withstand the elements and contain UV inhibitors, making them fantastic for outdoor furniture.
- Finishing Wax: Wax offers the softest, most natural-looking finish. It soaks into the pores and provides minimal protection but delivers a beautiful, hand-rubbed luster that feels amazing to the touch.
Here's a quick comparison to help you choose.
| Finish Type | Durability | Best For | Application Notes |
|---|---|---|---|
| Oil-Based Poly | Excellent | Kitchen tables, desks, high-traffic surfaces | Very durable, adds a warm amber tone. Strong odor. |
| Water-Based Poly | Very Good | Most indoor furniture, bookcases, light wood | Dries crystal clear, low odor, fast-drying. |
| Varnish | Excellent | Outdoor furniture, pieces near sunny windows | Highly resistant to water and UV damage. |
| Finishing Wax | Low | Decorative pieces, antiques, low-use items | Creates a soft, natural sheen. Needs reapplication. |
The topcoat is the handshake your furniture gives to the world. A smooth, well-applied finish says "quality" and "durability" before a single drawer is opened.
The Art of a Flawless Application
No matter which topcoat you choose, your application technique is what creates that silky-smooth, professional result. The secret is always thin coats, patience, and light sanding between layers.
First, make your workspace as dust-free as possible. Wipe down the furniture one last time with a tack cloth to grab any lingering particles.
Next, stir your finish gently—never shake it. Shaking introduces tiny air bubbles that will ruin your surface. Use a stir stick and go slow.
Grab a high-quality brush (natural bristle for oil-based, synthetic for water-based) and apply a very thin, even coat. Always brush with the grain in long, smooth strokes. Your goal is to lay the finish on and leave it alone.
Achieving That Glass-Smooth Surface
Here's where the magic happens. After the first coat is completely dry (check the can for the recoat time), it’s time to sand. This is more of a gentle scuffing.
Using very fine-grit sandpaper (320 to 400-grit), lightly sand the entire surface. You're just knocking down any tiny dust nibs. The surface will look dull and hazy, which is what you want.
Wipe away all the sanding dust, then apply your second thin coat. Two coats are usually enough, but for a high-traffic tabletop, three coats will give you maximum durability. You don't sand the final coat.
If you really want to dive deep, this guide to finishing wood with polyurethane is a fantastic resource.
The final step is also the hardest: waiting. While a finish might be dry to the touch in hours, it can take up to 30 days to fully cure. Be gentle with your newly refinished piece during this time.
Got Questions? We've Got Answers.
No matter how carefully you follow a guide, every refinishing project throws a curveball or two. It's totally normal to hit a roadblock and wonder, "Now what?" Think of this as your personal help desk.
We’ve pulled together the most common questions that pop up mid-project.
Can I Refinish Veneer Furniture?
You absolutely can, but you have to be gentle. Veneer is a paper-thin layer of real wood glued to a less expensive core, so you can't just attack it with an aggressive sander.
If the veneer is in good shape, a chemical stripper is a much safer bet than a power sander. If you do need to sand, stick with a fine-grit paper (think 220-grit or higher), use a very light touch, and always move with the grain.
How Do I Know What Kind of Wood My Furniture Is?
Figuring out the wood type is a great first step. The easiest trick is to find an unfinished spot—flip a table over or look inside a drawer—where the raw grain is exposed.
- Oak has that classic, coarse grain pattern.
- Pine is a much softer wood, lighter in color, with knots.
- Maple has a very fine, subtle grain that can almost look invisible.
- Cherry is famous for its fine, straight grain and beautiful reddish-brown color.
Knowing what you're working with helps you predict how it's going to behave with stain.
Why Is My Stain Coming Out Blotchy?
Ah, the dreaded blotches. This happens when the wood soaks up stain unevenly. It’s a notorious problem with softwoods like pine, maple, cherry, and birch.
The secret weapon against blotchiness is a pre-stain wood conditioner. Think of it as a primer for stain. It lightly seals the wood fibers so they absorb the stain evenly. This one simple step will save you a world of headaches.
Just wipe the conditioner on, let it soak in for about 15 minutes, wipe off any extra, and then go ahead with your stain. You'll get that smooth, consistent color you were hoping for.
How Long Should I Wait Before Using My Refinished Furniture?
Patience, patience, patience. The surface might feel dry to the touch within a few hours, but there’s a huge difference between "dry time" and "cure time."
Curing is the chemical process where the finish hardens to reach its maximum durability. For most oil-based polyurethanes, a full cure can take up to 30 days. Read the instructions on the can to be sure. Until then, treat your piece with kid gloves to avoid dings or scratches.
Love the idea of designer furniture but not the DIY project? Whether you're searching for "consignment near me" in Roswell, Marietta, or Alpharetta, we've got you covered. At Board of Trade Fine Consignments, our Roswell showroom is filled with curated, high-quality pre-owned designer furniture, decor, and fashion for both men and women. Save money, embrace sustainable style, and find your next treasure with us. Drop by today to browse our collection! Visit us at https://www.goboardoftrade.com.